Annotation Guide
This guide provides step-by-step instructions for accurately annotating objects in videos using Vidat, including bounding boxes, labeling, and instance tracking. For more detailed information, tutorials, and updates, please refer to the official Vidat GitHub repository anucvml/vidat.
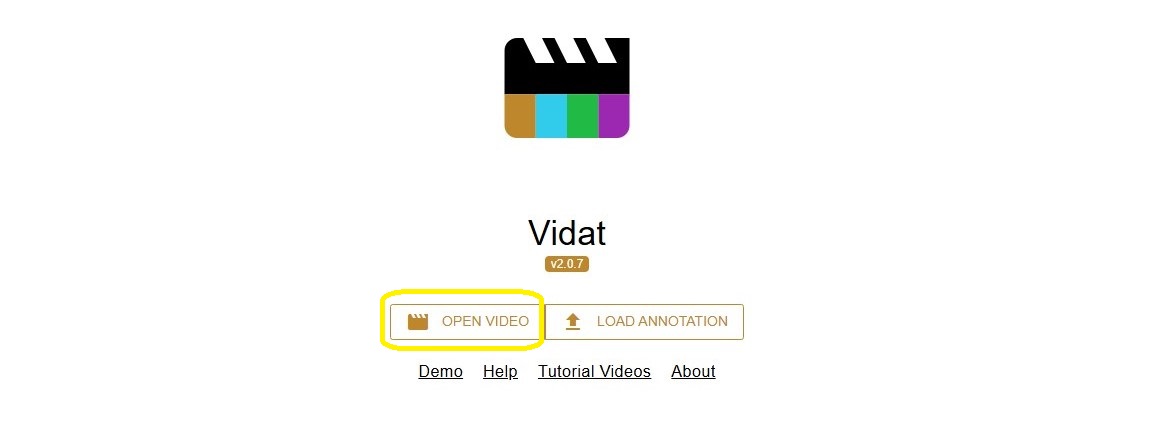
Launch Vidat
The home page with options to load a video. Click Open Video to select the video you want to annotate.
Open Video to Annotate
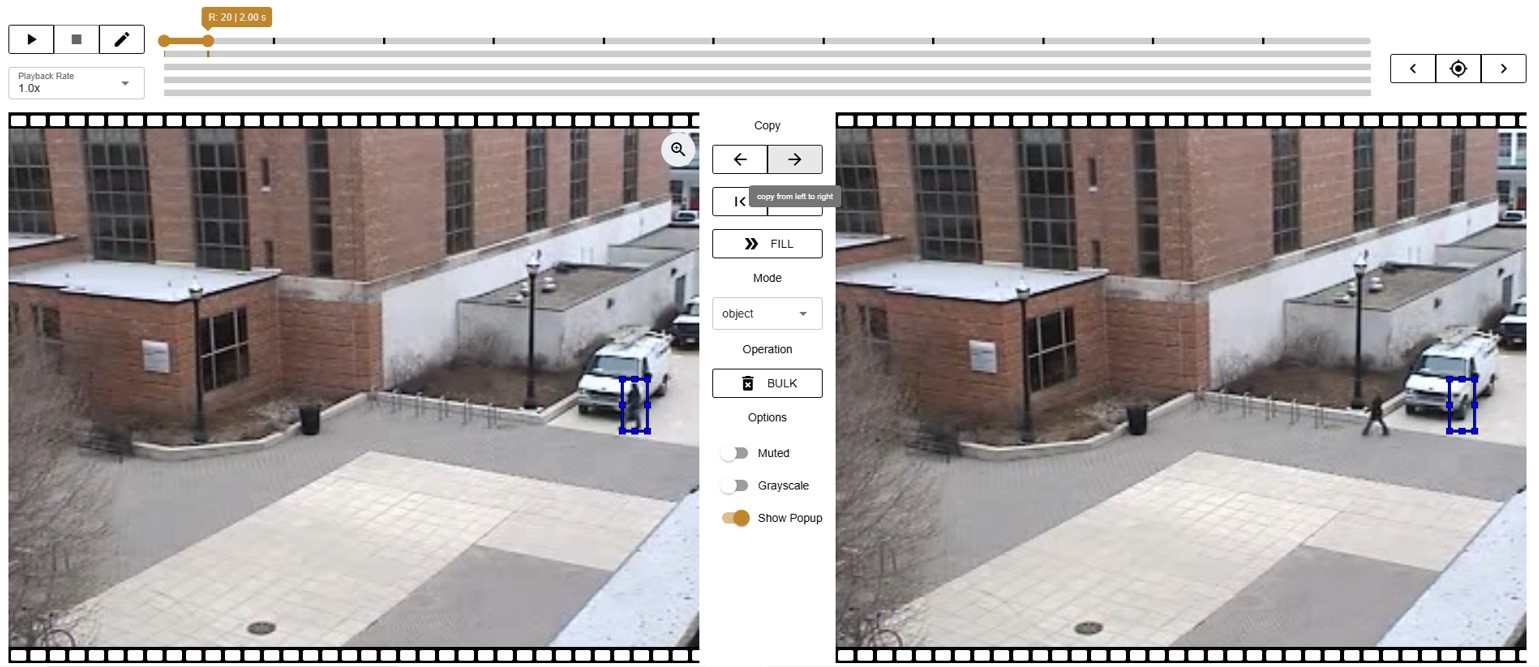
Open a video you want to annotete to Vidat. For this tutorial, the OSU Color Database (Dataset 03) from the VCIPL Benchmark Video Surveillance Database is used.
.

Creat boundary box want to annotate, lable and instances. In second panel copy same frame from preious boundary box and adjust position.
Use the navigation bar to move through frames. For efficient annotation, mark keyframes and proceed sequentially.
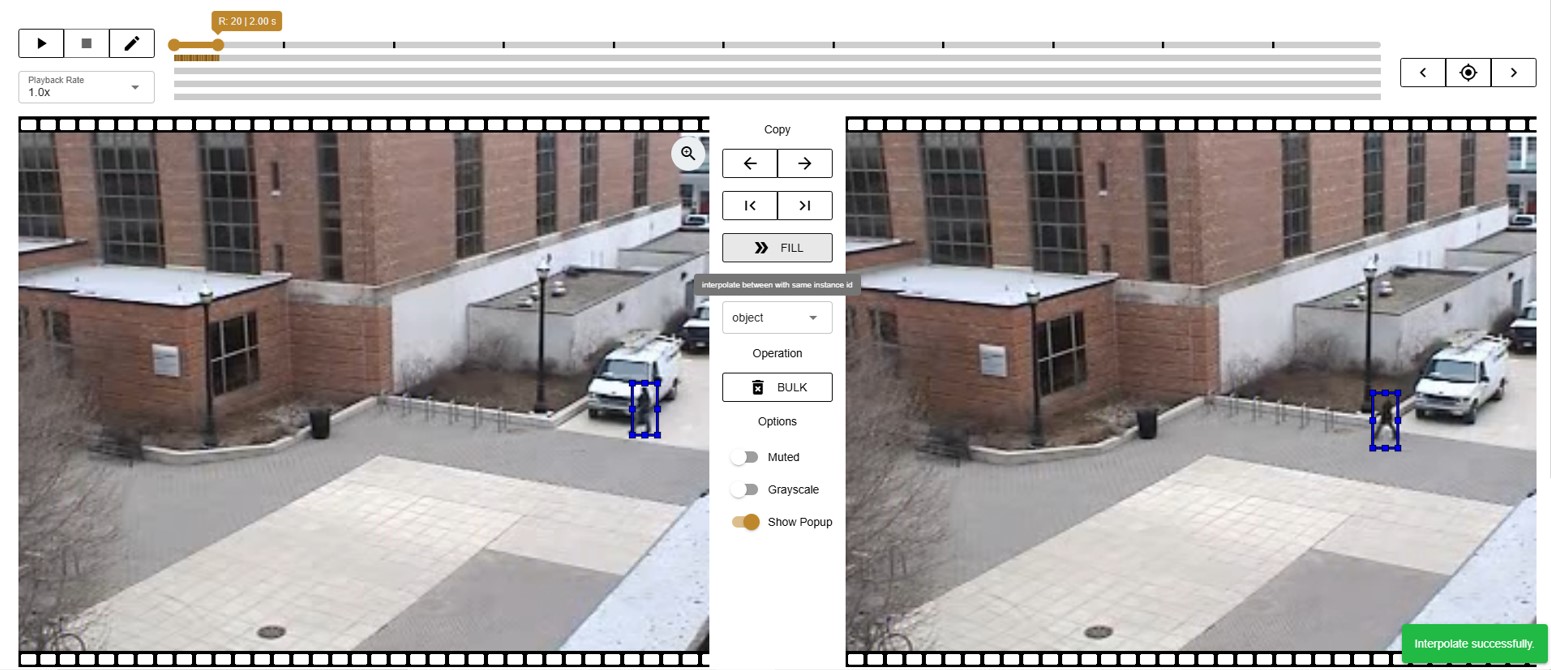
When keyframes are annotated, you can interpolate the positions for frames in between.
Ensure the same instance IDs are used and the movement between frames is gradual. Large gaps may cause inaccurate interpolation.

This makes annotation easy as fast.
Maintain Consistency
Use the same instance IDs for the same object across all frames. Ensure movement between frames is gradual; large gaps may reduce interpolation accuracy.
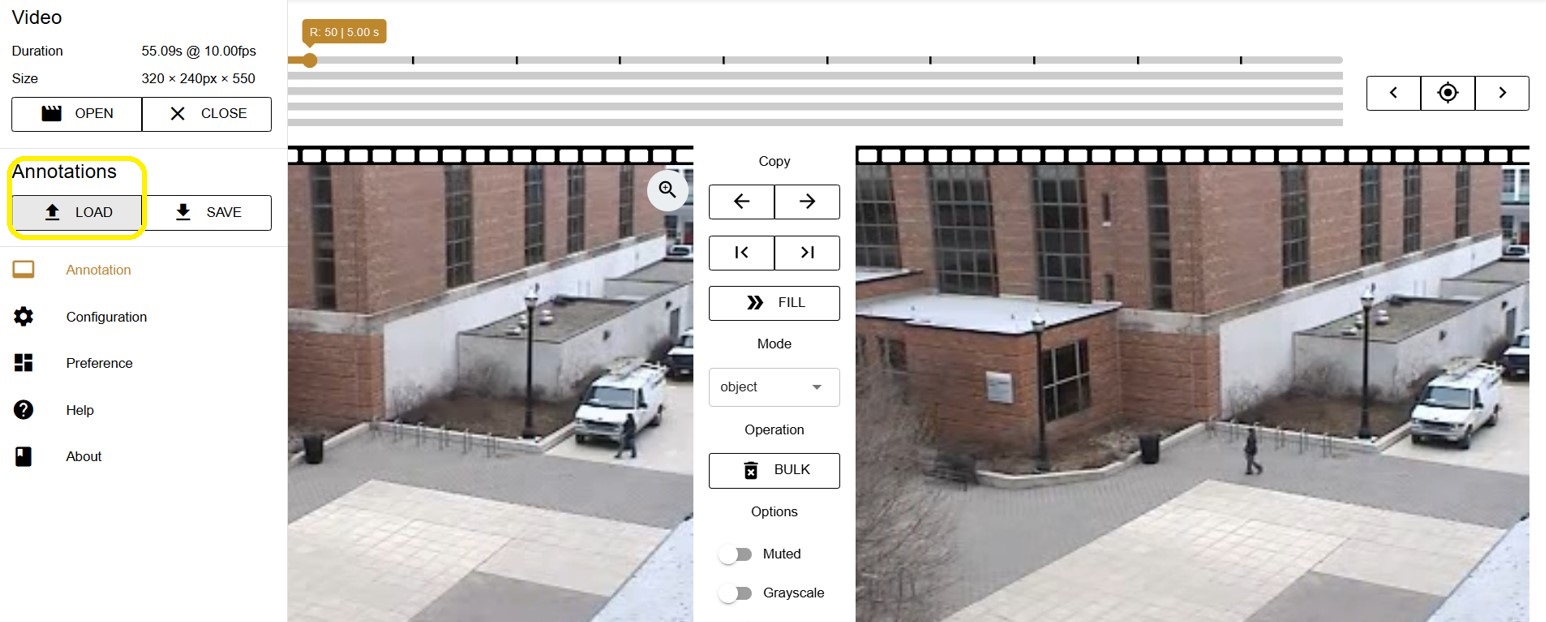
Open Previous Annotations
If you have already annotated a video and want to continue or modify it. Select the corresponding annotation file. The video and all existing bounding boxes, labels, and instance IDs will be loaded. You can resume annotation, adjust bounding boxes, or add new instances as needed.
Options
Vidat provides several useful options to enhance annotation efficiency and visualization:
-
Muted Disable audio playback while annotating to reduce distractions.
-
Grayscale Convert the video display to grayscale. This can help in focusing on object shapes and movement, especially in complex or colorful scenes.
Preferences
Vidat allows to customize various settings to optimize the annotation workflow. The Sensitivity setting, measured in pixels, determines how the tool detects object movement, with higher values allowing for more precise tracking. Default FPS sets the number of frames per second for video playback during annotation, while Default FPK specifies the number of frames per keyframe for interpolation, helping maintain smooth bounding box transitions.
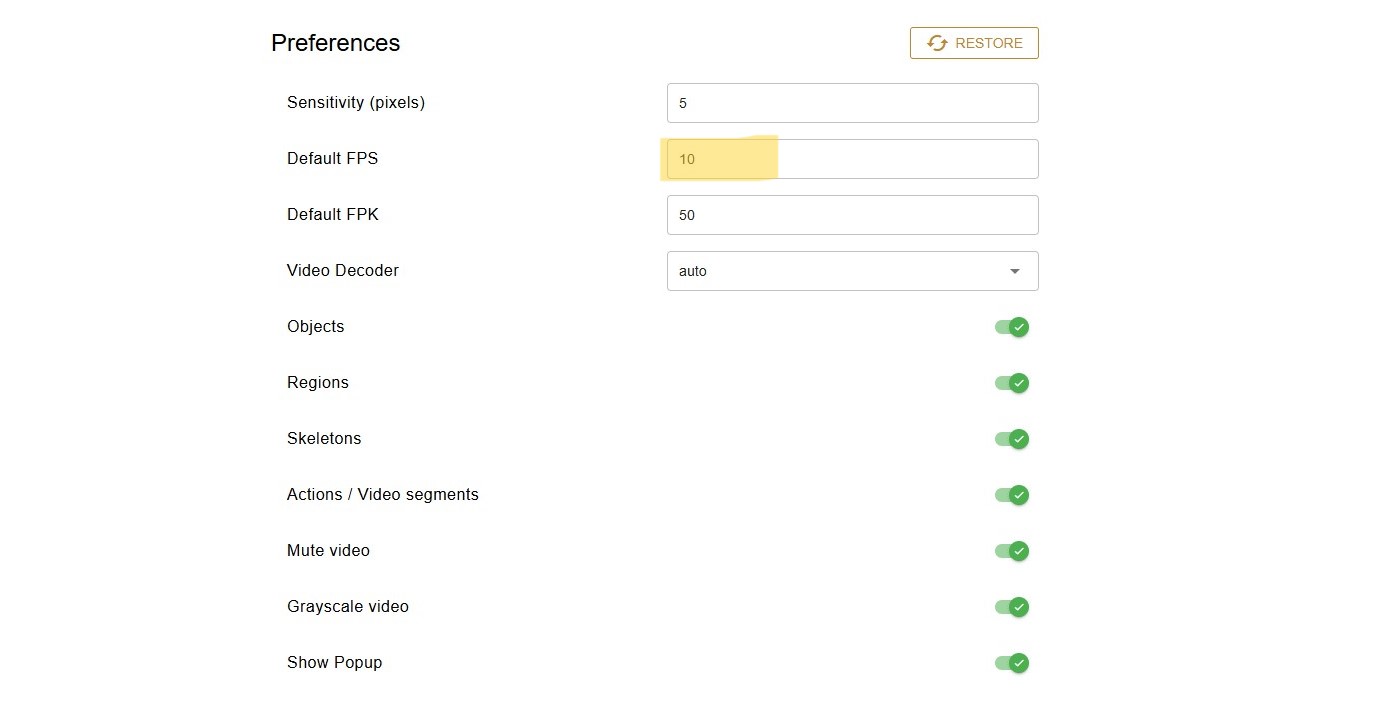
The Video Decoder can be set to auto or manually selected depending on the video format and system compatibility. Users can choose which objects to annotate, including Regions, Skeletons, or Actions / Video Segments, depending on the requirements of the project.